Showing posts with label chocolate. Show all posts

Monday, February 9, 2015

Reminiscing

This is just the beginning of a few posts leading up to Valentine's Day. For some reason, I got it in my head that I needed to find an old picture of a cake I had cobbled together last minute for a princess themed party another friend thought would be a fun addition to the weekend.  In retrospect, it wasn't as well executed or planned of an affair;  however, it was one of the first forays into frosting and decorating I like to think didn't turn out too horrifying,  but you may judge for yourself soon enough.

Do you ever reminisce of the past? Think of what ifs and what could have been? Of long lost loves and romance? This princess party reminded me of fairy tales, of those dreams each protagonist wished for. Just the idea alone of princes and princesses conjures up the image of romance. In any case, here is something I threw together a few years past of the endeavor. Can you tell the difference in writing if there is one?


* * *

Breakfast. Lunch. Dinner. What is a meal, anyway, but whatever food that serves to satisfy one's appetite at a certain time of the day? In our apartment during undergrad, the midnight snack became another meal, eaten in the dim light of a single light bulb obscured by a foggy yellow ceiling cover or consumed while perched on the edge of a roommate's bed. One week, vanilla buttercream frosted fudge cake dominated the midnight meal. Leftovers from a two layer pink and white frosted castle cake, homemade for a Prince and Princess Party hosted by a friend, the cake was both treat and torment.

Rich and dark, the cake balanced the sickeningly sweet buttercream, making it the perfect midnight treat when paired with a cup of cold milk. Homemade treats always taste better than store bought sweets, especially when the baking takes three hours and the assembly and frosting of the cake an extra two hours. I remember mixing the batter together, watching as the eggs and oil moistened the flour and cocoa mixture. As the smell of chocolate permeated the kitchen, I could already imagine eating the moist cake, still warm from the oven, but I had to resist. The frosting, on the other hand, was a different story. As I added more powdered sugar to the butter, I dipped my finger in to taste. At first, the slick oil feel of the creamed butter coated my tongue with a film of fat solids. It wasn't ready. After pouring in the rest of the box of sugar and a few dashes of vanilla, I stole another taste. One word. Costco. Licking the frosting remnants from my finger, I thought of the single layer Costco-sized buttercream frosted cake our high school Go Club bought to celebrate a tournament. So sweet that it was nauseating, the buttercream from that day matched the vestiges of vanilla and sugar sliding down my throat.

 Sugar and chocolate have been paired together since 1522 when the nuns of Oaxaca, an Aztec town, developed a new recipe for chocolate which combined cocoa, sugar, cinnamon and other spices to make the version of chocolate we know today. Chocolate arouses all our senses - smell, taste, sight, touch and sound - from the initial crackle of paper and plastic when the chocolate pieces are unwrapped to the last bite of sweet sugar and bitter cocoa melting together on our tongues. Historically, cacao beans were worth their weight in gold and used as currency. However, after Hernán Cortés introduced the bitter bean to Europe, the value of the cacao bean decreased. As Europeans - French, Spanish, Italians and Germans alike - planted the cacao tree to gain profits and obtain more of the desired cacao beans, the value of chocolate decreased. Now, most of us can buy chocolate in any grocery store for a low price and in several forms. Brownies, cake, chocolate bars and drinks. The availability of packaged fudge cake mix at Safeway persuaded me to make the castle cake chocolate flavored. Knowing that a chocolate frosting would overwhelm the cake and turn the dessert into an ordeal to finish, I decided upon a plain vanilla frosting, simplicity at its best.

Initially, brewed into a bitter drink, chocolate offered restorative powers due to the caffeine and energy stored in the beans. In today's society, fads come and go. Chocolate switches constantly between being good and bad on the basis of fat content and antioxidant factors. However, I paid no attention to any of the arguments for or against chocolate when deciding to bake a chocolate cake. The desire for chocolate, a sweet I saw as decadent and rich, motivated me instead. Chocolate producers argue for the health benefits of dark chocolate and the antioxidant effects of cocoa powder when unpaired with sugar, trying to rationalize the consumption of chocolate. Why deceive yourself? I thought. Even if the chocolate offers fitness advantages, the amount of fat from the oil, eggs and frosting negate the positive effects. As I stated before, a meal offers sustenance regardless of the composition and the time at which it is eaten. For me, chocolate cake offered comfort, energy in the form of sugar (the brain subsists upon sugar as a first energy source), and an overall feeling of happiness. J.K Rowling conceived the right notion of chocolate being a heal-all product in her books - chocolate solves depression as well as broken arms and empty stomachs.

Hunger makes even the simplest meal taste like a feast. In the middle of the night, when my stomach growled, I turned towards the leftover cake sitting on the kitchen table, pondering whether I should cut a slice or resist and go to sleep. It was inevitable. I sat down, stared at the white monstrosity and stabbed it, cutting a two inch slice of cake and sliding it onto a plate. Pink florets lay along the lower edge of the white buttercream, contrasting sharply with the dark brown of the chocolate fudge. Picking up a fork, I thought of the three sticks of butter and box and a half of powdered sugar I had mixed together for the frosting. I shrugged my shoulders and placed the cake in my mouth. The cake was still moist, crumbling apart as I chewed. Licking my lips, I tasted the overwhelming flavor of vanilla. A little stiff from standing on the cake uncovered except for a thin sheet of plastic wrap, the buttercream melted into a fluid mixture when it entered my mouth.

Knowing the ingredients of the buttercream did not stop me from finishing the slice of cake. In fact, resisting the urge to cut another slice was the hard part. The buttercream frosting was unhealthy, but good. As I ate, I made sure each bite of cake had frosting. Overly sweet, the buttercream coated my tongue with a film of melting butter and sugar. I anticipated each mouthful yet cringed slightly with the next intake of sugar. It was impossible to stop; I had to continue eating. Unlike chocolate, vanilla buttercream has nothing to redeem itself with - no possibility of possessing healthy antioxidants. Instead, saturated fats top the list of unhealthy aspects. Society today obsesses over the health benefits and negative effects of food to the degree that consuming baked goods such as cakes and pastries seems almost offensive.

In contrast, in our apartment, the lack of baked goods brought criticism. Where are the cookies? Why aren't you baking? Only two of the common questions that float around when no desserts are in sight. 

A week. A week had passed and cake still sat on the makeshift platter but now it resided on the countertop as opposed to the table. Only a 3 by 5 inch piece of cake was left but no one moved to eat the remnants of the castle. While my roommates and I did not consider the fat content of the frosted cake a deterrent, the amount of cake proves a challenge. The cake no longer holds the same fascination and temptation as the day it was baked. A week ago, the raw batter served as the forbidden fruit; I could not taste the results of my work until the party. A week later, the frosted cake held no more pleasure.

The cake has become dry except for where the frosting meets cake, holding in moisture. I cut off the next to last piece, hoping that it will disappear from my plate, but it does not happen. The taste of chocolate exists as a subtle companion to the cake, no longer the highlight but the accompaniment to the frosting. The buttercream requires milk to wash away syrupy sweet film coating my mouth. Even after swallowing, the taste of liquid sugar remains. Regardless of how good the initial bite was, after a week of cake, nothing tastes the same. When I initially wrote this, I had been in the process of trying to swallow the last bite on my plate. I couldn't help but cringe and think "Why? Why did I inflict this pain on myself?" Swallowing required effort.  I drank the last of my milk, but I could still taste sugar at the back of my throat. The cake satisfied my appetite, my need for food, but from the first midnight snack to this last meal, the marginal utility (i.e. the amount of pleasure attributed to the cake) decreased significantly. The first time, it was a pleasure. This last bite a chore. I had to force myself to chew and swallow.
Even made petri dish cupcakes from the extra batter and frosting

Sunday, January 11, 2015

Sinful Saturdays

Between this post and the last, you will not be lacking for something sinfully sweet when you have a craving. And the best part? Not only will you get two giant cookies (or 4 in my case) but it only takes one extra large egg. Mmm hmmm, that is correct. And if you only have enough room in your tummy for one of these monstrosities, both the raw egg as well as the unbaked dough can both be stored in your freezer for one of those rainy days when you can't be bothered to lift a finger, much less a mixing bowl.

A few warnings before you continue with this #recipe. Due to the alkali nature of the cocoa powder and the baking soda, it can have quite a bitter touch to it if your measurements are off, so measure accordingly. From previous experience, I can say that a lump of baking soda is not good eats. On that end, watch the baking of this cookie compared to the previous recipe. This one takes only about 13-15 minutes and it can be quite difficult to ascertain if the bottom of your cookie is burned due to the darkness of the dough. One more little tidbit before continuing, an extra large egg yields about 4 tablespoons, which as I said about, is about perfect for two giant cookie recipes.

Giant Chocolate Cookie

2 tbl unsalted butter (softened)
2 tbl granulated sugar
2 tbl brown sugar (light)
2 tbl beaten egg
2 tbl cocoa powder
1/4 cup (4 tbl) AP flour
1/4 tsp baking soda
1/2 tsp vanilla
dash of salt
Additions: chopped walnuts, chocolate chips

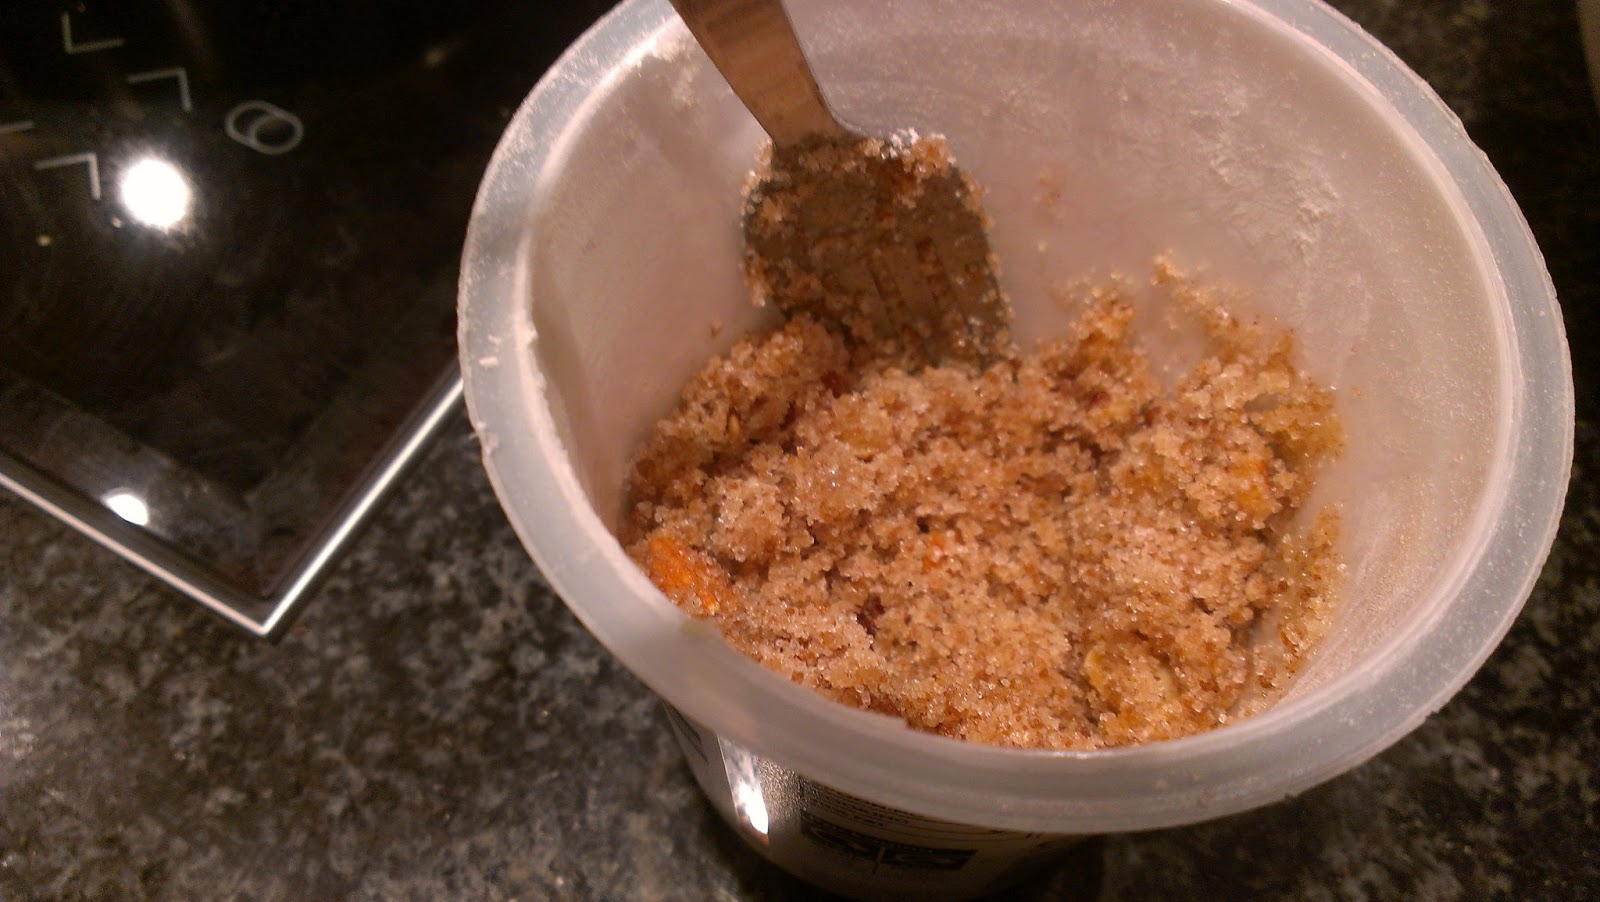
Cream together the butter and sugar. (I've been using a fork since it's such a small amount and who can be bothered to dirty proper mixing utensils?) Add the egg and vanilla. Mix. Combine the rest of the dry goods and mix until thoroughly combined. As with the previous recipe, here is where the fun begins. I added in chopped walnuts because that's what I had on hand but you can use anything as long as it doesn't exceed 1/4 cup of extra goodies.
Waiting to get baked

Bake at 350 F for about 13-15 minutes, watching carefully. The cookie will appear underdone but will set up as it cools. :) This is a sinfully chocolaty cookie, more on the dark and rich side instead of sweet and sultry. The center is like the chewy goodness of a brownie with the outside crackly.
Oops, a cookie monster took a bite

Tuesday, April 8, 2014

Pinterest Frenzy

Alright, so I know I've been a little MIA for the last few months, but I'm going to try and remedy that with a slew of posts of what I've made. After all, I didn't waste any of that time offline by cooking. Oh no, why would I ever do such a thing! :)

The coming weeks will hopefully be filled with more recipes that I've tried once.. twice... occasionally, three or four times. However, if you can't wait for the recipe and my take on it, here's a list of what's been occupying my time in between moving around Europe and the States, studying, making friends, cooking and crafting.

*** I've tried each of the following recipes and they've all turned out great. If you want any other ideas, just take a look on my main Pinterest board. Happy Cooking!

Savory
Jamaican Jerk Chicken
Whiskey Glazed Carrots
Pesto Stuffed Proscuitto Wrapped Chicken
Jalapeno Popper Stuffed Chicken
Garlic Butter Spaghetti with Herbs

Sweet
Gluten-Free Cream Cheese Frosted Pumpkin Cupcakes
Grand Marnier French Toast
Peanut Butter Honey Banana Ice Cream
Chocolate Loaf Cake
Buttermilk Banana Blueberry Bread

I've tried multitudes more but each of the above comes with special memories and stories I'll be posting up as I have time.

Wednesday, February 13, 2013

A New Year, A New Place

Another Chinese New Year has passed and again, I wasn't at home to celebrate. But I did spend the weekend with two people I really love - ate, cooked, went gallivanting around Camden Town and even watched a musical in the West End.

The UK really is dreary and wet - at least according to the weather.com app on my phone. :) So what else is there to do the week after Chinese New Year and the night before Valentine's Day? Bake a couple of cakes. Seriously, is there anything else I would do?

As a little consolation for not having posted since I left the island and was at home studying my brains out, here are two absolutely completely simple one bowl cake recipes you can whip up on any school night, after work, or in the middle of the night when you have insomnia and don't know what else to do. And the best part? I've made both of these with no measuring whatsoever. And they still turned out amazing. For the measuring inclined, I've included cups and such. ;)
Fresh out of the oven

Chocolate Loaf Cake
1 1/2 cups AP flour
1/2 cup cocoa powder (Green & Blacks)
3/4 cup sugar (I used granulated)
1 cup sour cream (leftover from burrito night - perfect use without waste)
1/2 cup oil
2 eggs
1 tsp vanilla extract
1 tsp baking powder
1/4 tsp baking soda
1/2 tsp salt
1 cup chocolate chips, a few spoonfuls of nutella, anything chocolate that floats your boat


The initial cut
For the chocolate cake, preheat the oven to 350 F (176 C).

In a large bowl, combine all of the dry ingredients, use a fork to sift together. Add all the wet ingredients and mix to combine. Don't overmix. (Yes, it's seriously that easy.)

Line a 9x5 loaf pan. Here's where things can be changed up. The first loaf I made was with chocolate chips so I stirred those into the batter and then poured into the pan. The second loaf had a swirl of Nutella running through it so I poured half the batter into the pan, then dolloped Nutella along the surface and filled the pan with the rest of the batter.

Bake for 60-70 minutes depending on your oven. 

If you have a rubbish oven because you're in hospital accommodations then bake for an extra 20 minutes and place a sheet of foil over the top of the cake to prevent burning. Yes. I know. Ridiculous but true. Still turned out yummy though. :)


Ravaged by two boys, a grown man and two women

And the second recipe of the day. A cinnamon swirl cake that looks quite lovely as an 8 inch round coffee cake as well.

Cinnamon Swirl Loaf Cake


2 cups AP flour
1 cup sugar
1 tsp baking soda
1 cup buttermilk
1 egg
1/4 cup oil
1/2 tsp salt


Cinnamon sugar almond topping
Cinnamon swirl
1/2 cup sugar
3 tbsp cinnamon

In a large bowl, combine all the cake ingredients and mix until combined. (I added a dash of cinnamon into the batter because I could).

Line a 9x5 loaf pan and pour in half the batter. In a small bowl, combine the sugar and cinnamon, sift half evenly over the batter. Pour the remaining batter into the pan and top with the remaining sugar mixture. Bake in a 350 F oven for 45-50 minutes. (As always, account for rubbish ovens by checking often.)

If you want to make this in an 8 inch round pan, my variation was to add chopped almonds into the batter and into the cinnamon sugar topping. Instead of layering like the loaf, I poured all the batter into the pan and topped with the sugar mixture, swirling slightly before baking for approx. the same amount of time.

Sunday, March 18, 2012

Everyday

This post is for a fellow student and one of the nicest guys I have met on the island. <3 Congratulations to Benji and Irene on their wedding today. :) If you haven't heard of Benji and his blog, head over to Diary of a Caribbean Med Student and start reading. I'll be especially disappointed if you're an AUC student and don't know his name.

But besides the point, this is an everyday kind of recipe for the type of relationship where not even thousands of miles will come between you. This is the recipe you make together, stirring chocolate and vanilla, sugar and butter together into a chocolate cake you can have every day, morning or night.

Everyday Chocolate Cake

1/2 cup butter (1 stick)
1 cup brown sugar
1/2 cup granulated sugar
1 egg
1 cup buttermilk
1 tsp vanilla
1.5 cups AP flour
3/4 cup cocoa powder
1/4 tsp baking soda
1/2 tsp baking powder
dash of salt
optional: chocolate chips

Line a 9x5 loaf pan and set aside. In a bowl, cream together the butter and sugars until you get a light fluffy consistency. Add the egg and mix to combine. Add the buttermilk and vanilla. If you don't have buttermilk, combine 1 tsp of lemon juice or vinegar and fill the rest of the cup with milk.

In a separate bowl combine all the dry ingredients: flour, cocoa, baking soda/powder and salt. Slowly add to the wet ingredients. You don't want a mushroom cloud after all. Fold in 1/4 - 1/2 bag of chocolate chips if you so desire. (I did.)
Pour into the pan. Bake at 325 for 50-60 minutes or until a toothpick comes out clean.

Sunday, March 4, 2012

As promised

As promised earlier, I did a little math and made that monstrosity of a flourless chocolate cake into a manageable two serving size. Not only did the calories count go down but the richness became something you could conceivably eat more of without getting overwhelmed. So here we go.

Two Serving Size Flourless Chocolate Cake

2 oz chocolate
2 tbsp unsalted butter
2 tbsp light brown sugar
1 tbsp granulated sugar
1 tbs brewed coffee
1/4 tbs cocoa powder
1 egg

Melt butter and chocolate in the microwave (takes about 1 min on high). Add sugars and coffee ( I had leftover coffee from the day before). Mix well. Toss in a bit of cocoa powder (I know I did math but truthfully, I just tapped some out of the can and into the bowl). Add the egg and mix until completely incorporated.

Lightly oil the bottoms of two large muffin cups.

Preheat oven to 350. Fill cups no more than an inch high (it WILL rise). Bake for about 45-50 min. It will be done with a toothpick goes in and wet crumbs come outAnd I bet an oven safe mug would work too, those giant one you can practically eat soup out of. Mmmm....

Saturday, February 18, 2012

Chocolate Heaven

This is most likely the first and last time I will EVER bake this cake. Why? you ask. Because when you see the ingredient list, your heart will begin to palpate quickly the same way mine did when I put together this small cake. This recipe is not for the faint of heart. No, it is for those who give their heart to others completely, for those who care deeply.

This is a flourless chocolate cake of proportions I will only make for those truly needful of such decadent pleasure.

And on this day, not even Valentine's Day was so deserving of such a recipe, Happy Birthday to my dear Candice. :) Early it may be to write this up but needful.

Flourless Chocolate Cake
*the recipe came from the Gluten Free Goddess but I've made some changes for those without food processors/blenders or don't want to clean up such machines

16 oz of semi-sweet chocolate (or any chocolate you wish)
1 cup light brown sugar, packed
1/2 cup granulated white sugar
1/2 cup very hot strong coffee or espresso
2 tbl cocoa powder, sifted
1 cup (16 tbl) of unsalted butter
8 eggs, room temp
1 tbl homemade vanilla

Preheat the oven to 350 degrees. Prep a 9 inch cake pan, if the sides are only about an inch high, line with parchment or foil with overhanging edges for the cake to rise. If using a 10'' cake pan, ignore the following, I also prepped two silicone baking cups of a large muffin size for excess batter.

In a double boiler (for those without a double boiler, place a glass bowl above a small pot with an inch of simmering water), melt together the chocolate and cubed butter. When it's all melted, add both sugars and hot espresso in batches, mixing thoroughly. Take the chocolate mixture off the double boiler and sift in 2 tbl of cocoa powder. When this is incorporated, begin to add your eggs one by one, whisking briskly to prevent the egg from cooking (you don't want scrambled eggs in your cake). The batter will get thicker with each egg. Right before the last egg, add the vanilla and whisk to incorporate everything.
Pour the batter into your pans and bake for 55-60 minutes at 350. Your skewer should go in cleanly and come out with a few moist crumbs.It's perfect with a drizzle of homemade ganache and sifted powdered sugar and a large glass of milk or mug of hot coffee - after all, you're bound to have made extra coffee when brewing for the cake.

If making this for a birthday as I did, make a batch of chocolate ganache.

Chocolate Ganache
1/4 cup heavy whipping cream
4 oz of semi-sweet chocolate
1 tbl butter
1 tbl irish whiskey (or any other flavoring you wish)

Heat together cream and butter until the butter is melted and the mixture hot. Pour in the chocolate and let sit for 5 min. Stir together and add in the whiskey. Drizzle over the cake, using a spatula to help spread the chocolate.

I flipped the cake upside down to have a flatter surface for writing and frosting. But feel free to just cut a slice, drizzle ganache over the top and ignore making a pretty cake in favor of eating it. :)

Sunday, September 25, 2011

Gluten Free but Gluttonous

Gluten free for many people brings to mind bland and tasteless, a similar connotation that vegan desserts have associated with them. But that's completely untrue. Granted, flavors and textures are not the same when it's a gluten-ful baked good, but GF baking has its own charms and the experimentation is endless.

This little crunchy cookie has its base in almond meal, essential blanched almond ground into flour. Such a concept opens up a whole new can of worms. Almonds, pecans, walnuts, hazelnuts - if you have a food processor or blender, a completely new arsenal of nut flours could be at your fingertips.

I used a store-bought almond meal because that's what I had on hand and wanted to use up, but you could substitute any nut flour you desire.
Chocolate Chip Almond Crunchies

1 cup almond meal (ground almond flour)
1/4 cup granulated sugar (I bet brown sugar would have made them chewier)
1 egg
3 tbls oil/melted butter
a dash of salt
1 tsp vanilla
1/2 cup chocolate chips (milk, semisweet, dark etc)

In a bowl, combine the flour, sugar and salt. Mix lightly. Add the rest of the liquid ingredients and mix until fully incorporated. Add in the chocolate chips. The batter will be more liquidy than the usual cookie batter made with all-purpose flour since there's no gluten.

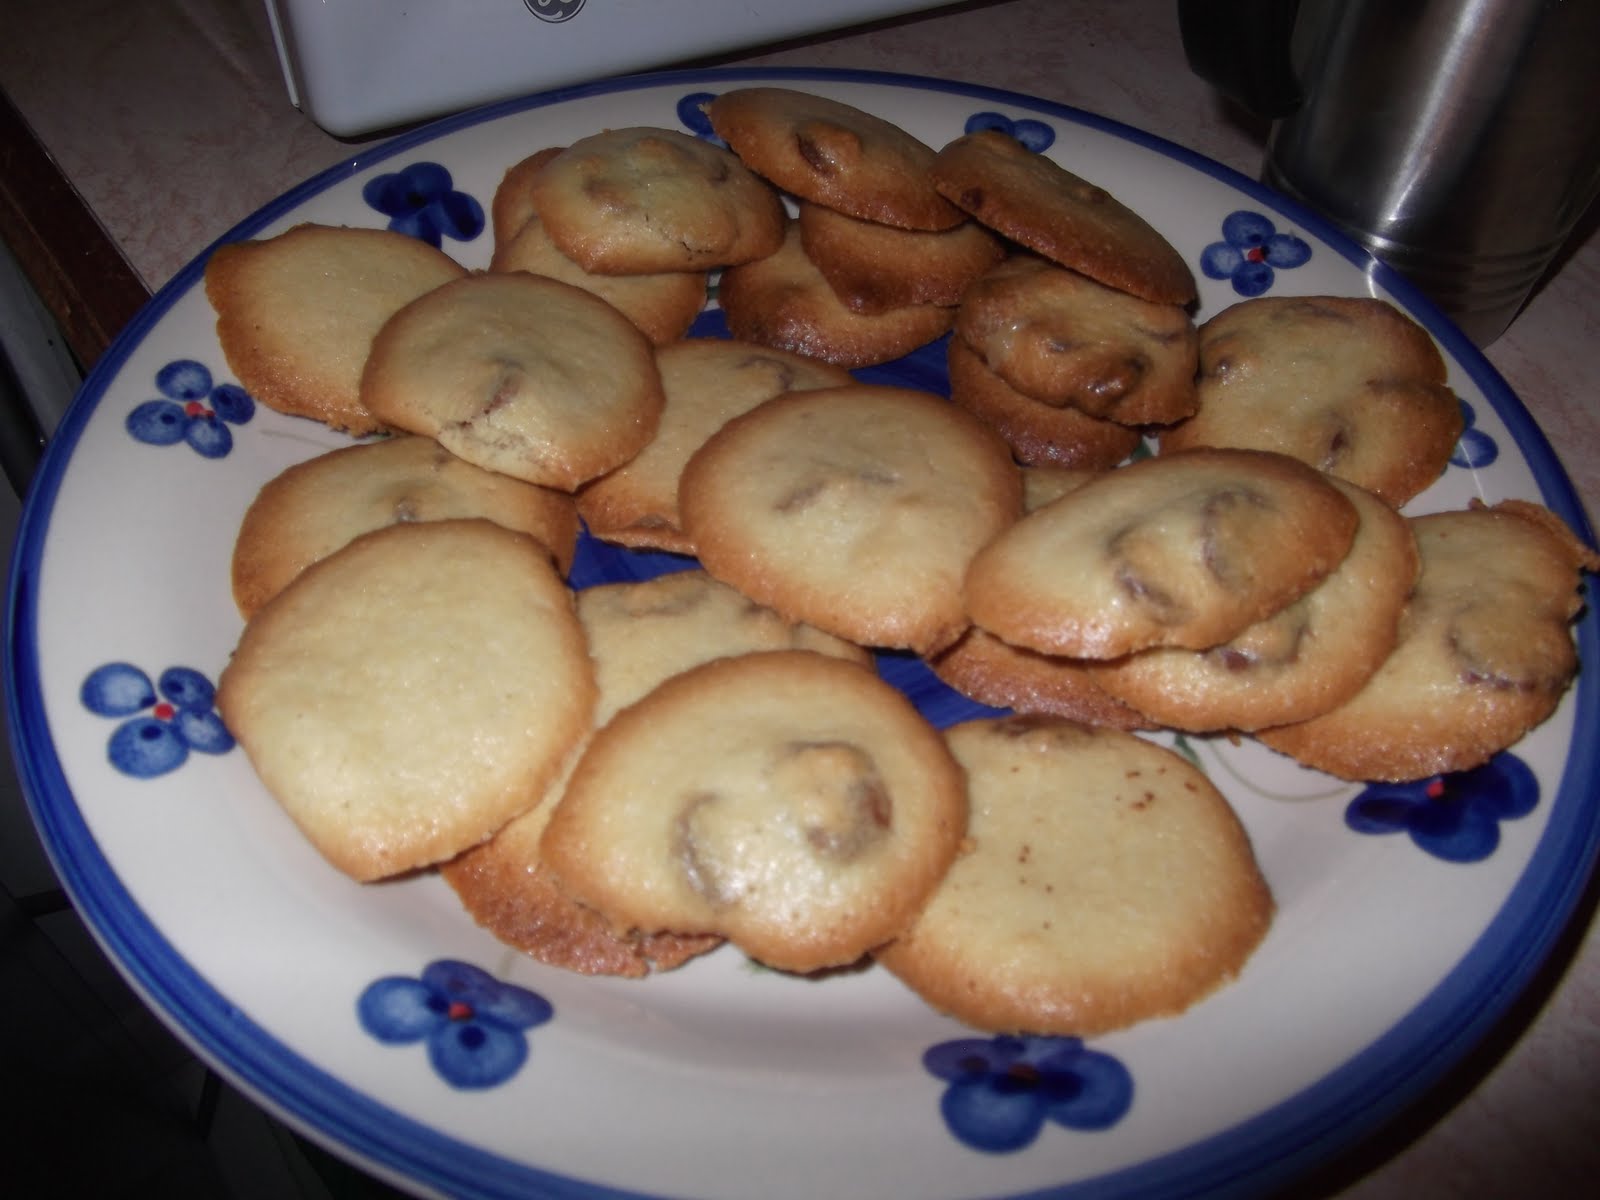
Preheat the oven to 340 degrees. Line a baking pan and drop teaspoons of batter onto the cookie sheet. These will spread, so place them 1-2 inches apart from one another. Baked for 12-15 minutes or until the edges begin to brown.
They're crispy, not overwhelmingly sweet and have a hint of almond that could be enhanced by using almond extract instead of vanilla. Perhaps the next time I come across almond meal, this will have to be tweaked to become a soft chewy cookie.


**there will be pictures... I promise. :)

Friday, September 2, 2011

Creepy Cookies

The first baked good of any semester must have a story behind it.

This one starts with stories about creeping people out, knocking on doors in the middle of the night and scaring them as they sit alone in their apartment at night. The best part comes when you see someone coming down the path whom you've never encountered before, you watch them go into a previously empty apartment and set down bags of luggage. Now those are the best "victims."

Unaware (ok... not all of them, only the ones who haven't heard of me and my oddball ways), they ask "who is it?" and I respond in a perky voice. Clearly, something is off. The best part is when the door opens and a puzzled face peers from behind the door. =D

I know... perhaps I take too much pleasure in it. But the best time to bake is the midnight hour. And anyone who is awake at that hour deserves a treat, no questions asked. =)

So, to ring in a new semester and welcome the newest members of our Regency family, here's a creepy chocolate cookie for late nights.
Salted Double Chocolate Cookies

8 oz. semisweet chocolate
4 tbs unsalted butter (1/2 stick)
2/3 cup all-purpose flour
1/2 tsp baking powder
3/4 tsp fleur de sel (sea salt)
2 eggs
3/4 cup packed light brown sugar
1 tsp vanilla
12 oz. semisweet chocolate chips or chunks

Preheat the oven to 350 degrees. Line two pans with parchment or foil.

In a double boiler, melt the 8 oz of chocolate and butter together until smooth. If you don't have a double boiler, place a heatproof bowl over about an inch of simmering water, making sure the bottom doesn't touch the water.

In a separate bowl, combine the flour, fleur de sel and baking powder. Mix until incorporated. Set aside.

In a small bowl, whisk together the eggs, brown sugar and vanilla until thoroughly mixed. Once the chocolate and butter has melted, quickly incorporate the egg mixture into the chocolate mix. Stir to combine and add the dry ingredients. Mix until no more streaks of flour remain.

Stir in the chocolate morsels.Drop tablespoons of dough onto the cookie sheets. Bake for 10-12 minutes or until the top is crackly but the cookie is still soft.

It's like a decadent brownie in cookie form. Nom nom nom.

Thursday, August 4, 2011

Cupcasms

For some odd reason, every time Candice and I are in LH#2, we end up having the most interesting discussions. The time I'm thinking of right now includes oocytes and embryology with some inventive vocabulary of our own based upon a story about knitting and yarn-gasms. Yes, I realize it sounds vaguely indecent, but between cupcake and cupgasm, which induces a sense of greater fulfillment and joy upon consumption?

Exactly. So without further ado, I present to you the cupcasm that has been on my mind for days on end.
Oreo Cupcake with Oreo Frosting

2 packages of Oreos (I used regular Oreos)

*the cake batter I used made an amazingly light cake but because of that the batter was too thin to keep the Oreo from floating to the top of the cupcake. If you want the sandwich cookie on the bottom of the cupcake liner, choose a denser cake batter.

Hershey's Chocolate Cake
2 cups sugar
3/4 cups cocoa powder
1 1/2 tsp baking soda
1 1/2 tsp baking powder
2 eggs
1/2 cup vegetable oil
1 3/4 cup flour
1 tsp salt
1 cup milk
2 tsp vanilla
1 cup boiling water

Oreo Cream Cheese Frosting
1 - 8-oz package cream cheese, softened
2 cups powdered sugar, plus extra if needed
1/4 cup milk
1/2 tsp vanilla extract

Quick Fix Frosting
1 can of prepared vanilla frosting

Preparation of Cake
Combine sugar, cocoa, both leavening agents (baking soda/powder), salt and flour in a large bowl. Mix to incorporate all the dry ingredients. In a separate bowl, combine oil, eggs, milk and vanilla. Stir to beat up the eggs and mix everything together. Add the egg mixture to the dry ingredients and mix until mostly combined. Pour in a cup of boiling water and stir quickly to incorporate. The batter will look very thin but the hot water begins the action of cooking some of the gluten and helps to produce a light soft cake.

Assembly
Line two muffin pans with cupcake liners and place an oreo in the bottom of each liner. You'll need about 30 oreos. If you don't have extra muffin pans, just line and fill as you go. Pour the batter over the oreos, filling the cupcake liner 1/2 to 3/4 full. Bake at 350 degrees for 20-25 minutes or until done. This particular cake batter is a little thin so the oreo will rise to the top of the cupcake as it bakes so if you want the sandwich cookie to remain as the base of the cupcake, use a thicker batter to hold the cookie down.Frosting Preparation
Beat cream cheese until fluffy. Add 1 cup of powdered sugar and milk, beating until well incorporated and no lumps remain. Add the second cup of powdered sugar and vanillia, mixing well again. If the consistency is too thin, add more powdered sugar. If too thick, add a little more milk.
Fill a ziploc bag with oreos, starting with half a package. Using a rolling pin or a mallet, crush the cookies into small pieces. Add into the cream cheese frosting and stir together. Frost the cupcakes with about 2 tbs of frosting.Frosting Cheat
So this is not the first time I have ever used prepared, canned frosting and neither will it be the last. And I am not ashamed to admit that I have a soft spot in my heart for overly sweet vanilla flavored concoctions. As with above, crush some oreos and add them into the frosting. If you like, add a little extra something (whiskey perhaps?) to keep the frosting from getting too hard. ;)

*Here's the cupcake cut in half...
Oreo... cake... frosting... it doesn't get any better...

Wednesday, August 3, 2011

Bliss in a Bite

Heaven and hell meet in this delectable treat of rich ganache, crumbly crust and pure melt in your mouth goodness. What are calories when the pleasure of spooning melted chocolate overrides any other desire or feeling of guilt?

Perhaps this isn't the best recipe for one's waistline, but in all seriousness, what does it matter when sitting in a lecture hall for 8+ hours a day isn't particularly flattering either? o.O Exactly. So just sit, take a spoon into your hand, watch the light slowly die from the shuttered blinds and immerse yourself in a little you time. ;)

Ganache Tart

Walnut Crust
2 - 6 oz. bags (approx. 3 cups) of walnuts, or any other nut you like
1/4 cup granulated sugar
1 stick (8 tbs) unsalted butter

Chocolate Ganache
1 cup whipping cream
16 oz (2 2/3 cups) semi-sweet chocolate chips
4 tbs unsalted butter
1 tsp vanilla (or almond extract, whiskey, irish cream, something to give it a little extra flavor)
Preparation

Walnut Crust
Using a food processor (or blender, like I did), pulse the walnuts into a fine grind. This is the basis of the crust and yields a nutty, crumbly crust without much trouble. Placing the ground walnuts into a bowl, add the sugar, mixing a bit. Melt the butter in the microwave and pour into the walnut mixture, mixing until all of the nuts are coated in butter. Taking a tart shell (or aluminum dish - anything oven safe), pat the mixture into an even layer, going up the sides to create a crust for the ganache filling. (I had enough to make one large tart and 4 individual muffin tin sized tarts)

Preheat the oven to 325 degrees and bake for 10 minutes or until the tart shell is slightly brown on the edges. Remove and let cool.

Ganache
Heat the cream and butter together in a small pot until the butter is melted and cream is warmed through. Turn off the stove, take the cream mixture off the heat and pour in the chocolate. Let sit for 5-10 minutes as the heat of the cream softens and melts the chocolate. Stir until completely incorporated and smooth. Add in the vanilla at the end.

*You may use other combinations of chocolate, such as dark, white. milk chocolate. However, the ratio of cream to chocolate will change slightly due to the water and fat content in the different types of chocolate. This is where I stop paying attention to measurements and add cream/chocolate depending upon the texture of the ganache mixture.

Assembly
Pour the ganache mixture into the tart shell. Tap on the counter lightly to even out the chocolate. Decorate with slivered almonds or extra chocolate chips placed at evenly spaced intervals along the circumference of the tart.Cool in the fridge for 1-2 hours or until the ganache has set up. Slice with a knife dipped into warm water to prevent the ganache from sticking. If the ganache begins to get too soft, cool in the fridge for a few minutes before resuming slicing.

Thursday, July 21, 2011

Craving Cookies, Chocolate and a Comfort Book

Cravings in the middle of the night aren't always the best idea... or are they? When cravings include chocolate, the need for baking cookies and reading a comfort book, the soothing power of a soft warm baked good spreads from morning to night, especially when paired with a mug of coffee in the early morning hours following a night of little sleep and too much endocrine physio.

So, searching for a slightly healthy cookie but with all of the trappings of an unhealthy treat, here's a cocoa colored cookie to fulfill those late night cravings.

Chocolate Oatmeal Cookies

1 stick (1/2 cup) butter
1/4 cup oil
3/4 cup brown sugar
1/2 cup granulated sugar
1 tsp vanilla
1 cup flour
1/2 cup cocoa powder
4 cups old-fashioned oats
1/2 tsp salt
1 egg
1/4 cup water

In a large bowl, cream together the butter and sugars. When combined, add vanilla, the egg, oil (I actually left out the oil, adding perhaps a tablespoon after mixing the wet/dry ingredients together) and water, stirring until incorporated. In a separate bowl, sift together, the flour, baking soda, salt, and cocoa powder. Add the dry ingredients into the wet ingredients. When mostly combined, add the oats and mix until no large clumps of flour and oats remain.

Preheating the oven to 350 degrees, line and oil a sheet pan. Form tablespoons of cookie dough on the sheet pan, pressing down lightly if you want thinner cookies. Bake for 15 mins at 350 or until done. Makes about 30 cookies.

*Yes, I realize there is no picture this time. =( If they're not gone by the afternoon, perhaps there shall be one. ^_^

Wednesday, July 6, 2011

O is for Oreo, and my Open mouth

It was a rainy Emancipation Day on the island. It was meant to be... stir-fried noodles, chocolate dipped everything, cream cheese and nachos in an amazing townhouse.

Have I set the scene yet? ^_^

Good. Now imagine... in a fit of controlled crushing, we turned a package of regular Oreos into fine pieces of chocolate crumbles. But it's not the end. The pièce de résistance was the addition of a block of softened cream cheese to tie the entire recipe together. It was no surprise that the first batch of Oreo truffles disappeared in the span of a day (maybe two...) and prompted the purchase of another bag.Why, you ask? Because they're good. Is there any other reason for buying chocolate cookies sandwiching sweet cream in between them?

So, a few days later, in another neurotic compulsion to do something with my hands, I filled a gallon sized ziploc with a 16 oz package of Oreos, half a dozen Ferrero Rocher chocolates and half a dozen Ferrero Rondnoir and proceeded to smash them into bits. I must say, it was quite a satisfying procedure. ^_^ But for those who require a bit more instruction, here's the recipe.

Oreo Truffles
1 - 16.6 oz package of Oreos (regular, mint, fudgies, chocolate, whichever you like)
1 - 8 oz block of cream cheese
a dash of vanilla, mint, almond extract - whatever flavor you like
(If you were feeling a little overwhelmed with the amount of chocolate you have stashed away, like yours truly, a handful of Ferrero Rochers crush up wonderfully)
1 - 12 oz bag of chocolate chips (milk, semi-sweet, dark, white, or any combination)

So taking the entire bag of Oreos, empty the cookies into a gallon sized Ziploc bag and close it. This is your opportunity to work out a bit of that stress you feel. If you're adding in chocolate candies, this is the time to add them in (the hazelnuts in the centers crush up just as easily). If you have more technology at your fingertips, feel free to pulse them into oblivion using your handy-dandy food processor.

Transfer the cookie crumbles into a large bowl and add the block of softened cream cheese. Now taking a fork, your bare hands, (a potato masher works amazingly!) combine everything together. Don't forget to sneak a taste. ^_^ When everything is incorporated, add the extract of your choice if you have it on hand and mix.To form the truffles, take a small ice cream scoop or a tablespoon measure and make a mounding ball, dropping the finished truffle onto a parchment or foil lined sheet pan. Repeat until all of the mixture is used up. Place in the fridge to cool and harden while you melt the chocolate in the microwave or double boiler. The freezer is a quickie way to get the truffles cool and hard enough to dip without falling apart into the melted chocolate. Granted, it just means more for the baker. ;)

Taking the truffles, dip them one by one into the chocolate, coating them completely before returning them to the sheet pan. When all of them have been coated, return to the fridge or freezer until the chocolate has set up again. Then... munch!The hard chocolate coating compliments the soft, melt in your mouth texture of the truffle. Now, I'm a purist and have made chocolate truffles from scratch but there's a time and place for everything and these Oreo truffles balls are perfect for rainy days, mocha colored puppies and good times with friends on a tropical island.

Sunday, July 3, 2011

Black and White and everything inbetween

Like little yin-yang chocolate treats, these peanut butter crackers are made even more special when coated in two types of chocolate. Feel free to change it up any way you like, instead of peanut butter, use Nutella, or even both. Don't like white chocolate? Melt up some dark chocolate and sprinkle with a dash of sea salt for a sweet and salty treat.Ritz Cracker Sandwiches

1 sleeve of Ritz crackers (I used whole wheat Ritz because that's what I had on hand)
Creamy Peanut Butter
White and Semi-Sweet Chocolate to coat

Taking about a 1/2 tablespoon of peanut butter, spread it on a cracker and top with another. Continue until the entire sleeve of Ritz crackers is gone (minus the ones being munched on in the process of creating peanut butter cracker sandwiches).

Line a pan with foil or parchment paper. Melt chocolate in a double boiler or in a heatproof bowl on top of a pan with about an inch of simmering water. Dip one half of the sandwich in the white chocolate, set on the pan to set in the fridge for about 10 minutes. When the chocolate is set again, take them out and repeat with semi-sweet chocolate for the other uncoated half of the cracker sandwich. Place in the fridge again to finish setting (or if you're impatient like me, 5 minutes in the freezer should do the trick. ^_^)It should make about 16 sandwiches.... depending on how many Ritz you eat before they get peanut butter sandwiched between them... or if they've survived this ordeal... how many you eat before they get smothered in chocolate...