Sunday, March 18, 2012

Everyday

This post is for a fellow student and one of the nicest guys I have met on the island. <3 Congratulations to Benji and Irene on their wedding today. :) If you haven't heard of Benji and his blog, head over to Diary of a Caribbean Med Student and start reading. I'll be especially disappointed if you're an AUC student and don't know his name.

But besides the point, this is an everyday kind of recipe for the type of relationship where not even thousands of miles will come between you. This is the recipe you make together, stirring chocolate and vanilla, sugar and butter together into a chocolate cake you can have every day, morning or night.

Everyday Chocolate Cake

1/2 cup butter (1 stick)
1 cup brown sugar
1/2 cup granulated sugar
1 egg
1 cup buttermilk
1 tsp vanilla
1.5 cups AP flour
3/4 cup cocoa powder
1/4 tsp baking soda
1/2 tsp baking powder
dash of salt
optional: chocolate chips

Line a 9x5 loaf pan and set aside. In a bowl, cream together the butter and sugars until you get a light fluffy consistency. Add the egg and mix to combine. Add the buttermilk and vanilla. If you don't have buttermilk, combine 1 tsp of lemon juice or vinegar and fill the rest of the cup with milk.

In a separate bowl combine all the dry ingredients: flour, cocoa, baking soda/powder and salt. Slowly add to the wet ingredients. You don't want a mushroom cloud after all. Fold in 1/4 - 1/2 bag of chocolate chips if you so desire. (I did.)
Pour into the pan. Bake at 325 for 50-60 minutes or until a toothpick comes out clean.

Thursday, March 15, 2012

Home is Where the Heart is

Whenever I begin to miss my parents and brother even the slightest bit, I always have a craving for chinese food. Doesn't matter if I don't usually eat it. Doesn't matter if I don't even like it. I WILL find the means to make it. And so, here is today's recipe from home.

After a few months, I found rice flour (asian brand at that - just plain white rice flour - not brown, not glutinous). A little while later, I got my hands on some tapioca starch. I know, I know. Sad but true, it took about 3 and a half months before this recipe finally came to be. But you know what. It was worth it. I already had lap cheong scurried away in my freezer and dried shrimp in the fridge, a canister of shiitakes from home, already with their stems taken off. But daikon radish. Another elusive item I had seen only at one store on the island.

If you're on St. Maarten, between the Grande Marche in Cole Bay and Maho Market, you can get most of the essentials for this staple of dim sum. Sadly, anything remotely ethnic will require a shopping trip at home or a special care package from those who love you the most.

Rice flour/daikon radish/green onions - Grande Marche - Cole Bay (they often have a lot of gluten free flours and mixes)
Tapioca starch - Maho market
Dried shiitakes - Afoo supermarket in Philipsburg (they might even have dried shrimp/lap cheong - unlikely but worth a shot)
Lor Bak Go 蘿蔔糕
2 cups rice flour
1/4 cup tapioca starch
3 cups shredded daikon radish
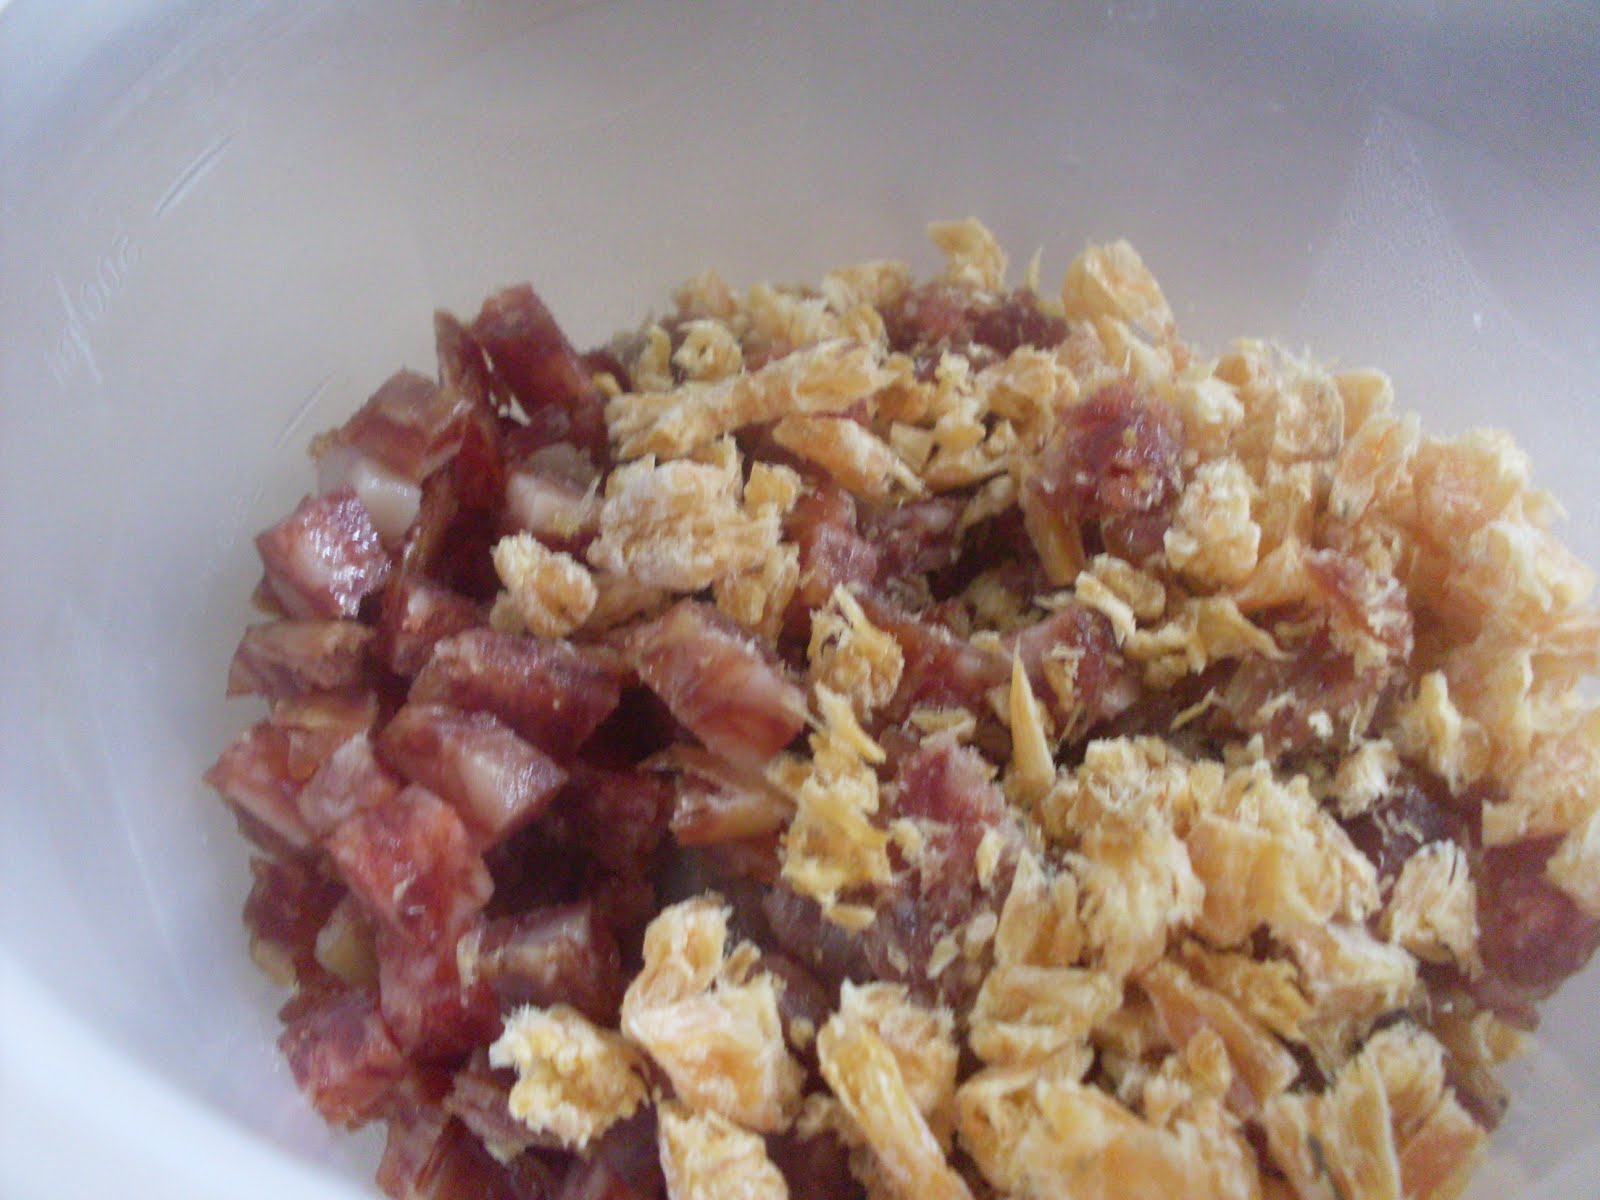
2 links lap cheong 臘腸 minced
1 green onion, minced
4-5 dried shiitakes, soaked and minced
handful of dried shrimp, minced
3 cups of reserved cooking liquid/water
salt to taste

In a large bowl, combine the rice flour and tapioca starch. Add about 3 cups of liquid to the shredded daikon and boil in a pot until cooked. Drain the daikon and reserved the liquid. In a small bowl, soak the shiitakes. Mince the lap cheong and dried shrimp. When rehydrated, mince the shiitakes and green onion.Add the cooked daikon to the flour mixture with the green onion, add the 3 cups of liquid slowly and mix until no clumps remain. In a pan, do not add oil, cook the lap cheong, dried shrimp and shiitakes until softened/cooked. Add to the flour/radish mixture and combine. The batter will be neither thick nor thin.
Using a steamer safe dish, pyrex, aluminum whatever you have on hand, oil the dish lightly and pour in the batter. I used two dishes, one about 12 inches in diameter and the other about 7 inches with sloping sides. The depth of the batter will determine your cooking time. I steamed the smaller pan for about 30 mins and the larger for 40 minutes. You will be able to tell when the lor bak go is cooked. The mixture will go from liquid to solid to opaque/white to opaque but slightly clear and a toothpick in the center will come out clean. Don't forget to check the water level on the steamer and add more boiling water as needed.

When steamed, take out and let cool. Slice into 2-3 inch pieces and fry in a little oil if desired. Fresh out of the steamer, it tastes better as if without frying.

Sunday, March 4, 2012

As promised

As promised earlier, I did a little math and made that monstrosity of a flourless chocolate cake into a manageable two serving size. Not only did the calories count go down but the richness became something you could conceivably eat more of without getting overwhelmed. So here we go.

Two Serving Size Flourless Chocolate Cake

2 oz chocolate
2 tbsp unsalted butter
2 tbsp light brown sugar
1 tbsp granulated sugar
1 tbs brewed coffee
1/4 tbs cocoa powder
1 egg

Melt butter and chocolate in the microwave (takes about 1 min on high). Add sugars and coffee ( I had leftover coffee from the day before). Mix well. Toss in a bit of cocoa powder (I know I did math but truthfully, I just tapped some out of the can and into the bowl). Add the egg and mix until completely incorporated.

Lightly oil the bottoms of two large muffin cups.

Preheat oven to 350. Fill cups no more than an inch high (it WILL rise). Bake for about 45-50 min. It will be done with a toothpick goes in and wet crumbs come outAnd I bet an oven safe mug would work too, those giant one you can practically eat soup out of. Mmmm....

Sunday, February 26, 2012

Breakfast for Breakfast and Lunch and Dinner?

I love breakfast food. It's probably one of the most comforting things besides rice smothered in a savory sauce with meat and vegetables, pasta or any other carbohydrate you can think of when you think of a rainy day, a bit of a sad atmosphere and the need for filling food that's easy and fast.

As it's block weekend, the day before blocks in fact, breakfast for dinner is a must. But a lack of ingredients is a bit of a set back. Luckily, there are good friends who will help you buy a rasher of bacon when you're craving it and brown sugar is just as good as white if you're out.

So, turn on the stove and start making breakfast wherever and whenever it is.

Brown Sugar Pancakes

3/4 cup AP flour
3/4 cup milk (I used 2%)
2 tbls brown sugar (you can use white if you want but I ran out. It's preblocks - no one has groceries)
1 tsp baking powder
1/4 tsp salt
2 tbls oil (or melted butter if you wish)
1 egg
dash of vanilla

Mix everything together in a bowl, some lumps are okay. Heat a pan over medium heat and brush with a bit of oil or butter. When the pan is hot, pour the batter. I made 3 large pancakes about 7 inch wide. I suggest smaller pancakes for those who don't want them as big. Bubbles will begin to appear on the surface of the batter, when the bottom is brown, flip and cook the other side for another 1-2 minutes. You can keep them warm in a 200 degree oven if you're making a lot. Smother in maple syrup and butter and consume.

I made a few slices of bacon to go with the pancakes. :)

Wednesday, February 22, 2012

Whim and Whimsy

I've always been attracted to do-it-yourself (DIY) projects, minus the ones including sewing (I seem to have issues with sewing machines and needle/thread). Knitting and crocheting shrugs, shawls and sweaters. But the accessories that always compels me are articles of jewelry, whether rings, earrings or pendants.

Etsy is always an amazing source of inspiration, and recently Pinterest has been a good venue for seeing what has captured other people's interest. Beading and wirework have always been popular but recently the newest crave in handmade jewelry includes a combination of the two as well as traditional Peruvian thread art and scientific/artistic/historical influences.

The first of the batch are bird's nest wire wrapped beads which can be used for pendants or earrings. I used 3 beads of different colors as my eggs and made "matching" pieces for earrings.
The Bird Nest Necklace tutorial can be found here.

Next up are DNA helix earrings made of seed beads and bugle beads interspersed on headpins and then twisted.
I saw these on etsy but couldn't justify spending $20+ not including shipping for something I could easily make myself.

At the same time, I had a plethora of seed beads and decided to make a few baubles which could be used when I felt the need to wear something different and boost my mood.

Along the same lines of the bird's nest pendant, I created a wire nest and strung beads onto the wire and wrapped it around the "nest."You could add this onto a plain ring or string it on a chain.
Since we're on an island, I love incorporating sea glass and shells into my jewelry to remember things by.
Wandering around the interwebs, I found some Peruvian thread art earrings and googled a tutorial.
The basic concept is the same, involving wire coils and thread of multiple colors.
They can be tear-shaped and made into earrings or pendants.
Or even circular.

Wire-wrapping can be easy with the right tools, or just a good way to express yourself without worrying about how clean a wrap turns out as long as the overall piece is something you like. From the thread art earrings, a link showed me a blog with multiple pieces of wire-wrapped bead work creating animals and zodiac signs. Since Sagittarius seemed the most feasible, I concocted a more basic version of the bow and arrow the hunter uses.

Saturday, February 18, 2012

Chocolate Heaven

This is most likely the first and last time I will EVER bake this cake. Why? you ask. Because when you see the ingredient list, your heart will begin to palpate quickly the same way mine did when I put together this small cake. This recipe is not for the faint of heart. No, it is for those who give their heart to others completely, for those who care deeply.

This is a flourless chocolate cake of proportions I will only make for those truly needful of such decadent pleasure.

And on this day, not even Valentine's Day was so deserving of such a recipe, Happy Birthday to my dear Candice. :) Early it may be to write this up but needful.

Flourless Chocolate Cake
*the recipe came from the Gluten Free Goddess but I've made some changes for those without food processors/blenders or don't want to clean up such machines

16 oz of semi-sweet chocolate (or any chocolate you wish)
1 cup light brown sugar, packed
1/2 cup granulated white sugar
1/2 cup very hot strong coffee or espresso
2 tbl cocoa powder, sifted
1 cup (16 tbl) of unsalted butter
8 eggs, room temp
1 tbl homemade vanilla

Preheat the oven to 350 degrees. Prep a 9 inch cake pan, if the sides are only about an inch high, line with parchment or foil with overhanging edges for the cake to rise. If using a 10'' cake pan, ignore the following, I also prepped two silicone baking cups of a large muffin size for excess batter.

In a double boiler (for those without a double boiler, place a glass bowl above a small pot with an inch of simmering water), melt together the chocolate and cubed butter. When it's all melted, add both sugars and hot espresso in batches, mixing thoroughly. Take the chocolate mixture off the double boiler and sift in 2 tbl of cocoa powder. When this is incorporated, begin to add your eggs one by one, whisking briskly to prevent the egg from cooking (you don't want scrambled eggs in your cake). The batter will get thicker with each egg. Right before the last egg, add the vanilla and whisk to incorporate everything.
Pour the batter into your pans and bake for 55-60 minutes at 350. Your skewer should go in cleanly and come out with a few moist crumbs.It's perfect with a drizzle of homemade ganache and sifted powdered sugar and a large glass of milk or mug of hot coffee - after all, you're bound to have made extra coffee when brewing for the cake.

If making this for a birthday as I did, make a batch of chocolate ganache.

Chocolate Ganache
1/4 cup heavy whipping cream
4 oz of semi-sweet chocolate
1 tbl butter
1 tbl irish whiskey (or any other flavoring you wish)

Heat together cream and butter until the butter is melted and the mixture hot. Pour in the chocolate and let sit for 5 min. Stir together and add in the whiskey. Drizzle over the cake, using a spatula to help spread the chocolate.

I flipped the cake upside down to have a flatter surface for writing and frosting. But feel free to just cut a slice, drizzle ganache over the top and ignore making a pretty cake in favor of eating it. :)

Wednesday, February 8, 2012

When a chicken comes back to roost

When a chicken comes home to roost, you get chicken strips. Alright, so the saying has more of a negative connotation, what with curses coming back to bite you, an eye for an eye sort of deal, but this is more good than evil. Well... if you like spicy food that is.

I've been using Pinterest lately to look at recipes, DIY crafts and ideas. I mean, I'm stuck on an island with limited resources. I need to branch out somehow. I found this recipe through a pin that someone else had put on their board. Anyway, if there's a recipe I've tried, but I haven't had the time to post about it yet, I'll try to pin it. So Follow Me on Pinterest. Granted, there'll be plenty I haven't tried. But here's one I just made for dinner. :)
Sriracha Chicken Strips

2 boneless skinless chicken breasts
1/3 cup Sriracha (or another hot sauce you have on hand)
1 tbs rice vinegar
1 tsp Maggi sauce (or soy sauce)
3 cloves of minced garlic
1 inch minced ginger
1/2 cup flour
1 large egg
1-1.5 cups panko bread crumbs
salt/pepper to taste
garlic salt
dried parsley

Slice the chicken breasts into 1/2 inch pieces, I got about 10 pieces from a large chicken breast. The original recipe had about 12 pieces of chicken from 2 breasts. In a large gallon ziploc bag, combine the Sriracha, vinegar, Maggi sauce, garlic and ginger. Put the chicken strips in the bag and marinate in the fridge between 1-4 hours. I let them sit for about 2 hours.

When you're ready to bake, prepare the worktable. Preheat the oven to 375 degrees. Take the chicken out of the fridge. On a small plate, pour out the flour. In a small bowl, whisk the egg. Place the bread crumbs in another small dish with the salt/pepper/garlic salt/dried parsley. This is a bit of an assembly line. I also lined a pan with foil and oiled it lightly.

Using chopsticks, I dredge the chicken in the flour, shaking off the excess. Transferring to the egg, I coated it before rolling in the breadcrumbs and laying it onto the sheet pan. If you use your hands instead of chopsticks, have one wet and one dry hand so that it doesn't get so messy.

When all the chicken is coated, place in the oven for 20 minutes. I flipped the chicken halfway through and then broiled the bottom side for 2 minutes before taking them out.They're crispy, not too spicy with a hint of Sriracha.

Monday, January 23, 2012

新年快樂! Happy Chinese New Year

So I know I've been neglecting the blog for quite some time, but it was becoming the end of the year, end of the semester and things were crazy. My camera decided that it just wouldn't work anymore, although that shouldn't have stopped me from posting up recipes and cooking. I spent hours at school and minutes and home. My bill clearly reflected all of that time spent in my dungeon in the sky. But it's a new semester and new year. So to start things off, here's a little something I whipped up despite a lack of veggies and other foodstuffs.

And not to neglect those at home...
新年快樂! For all the students, 學習進步 and for all those working, 生意興隆! To everyone with blocks today, 金榜題名.
Pan-fried Buns with Turkey and Green Onions
Original recipe is Pan-fried Buns with Chives and Minced Pork (more traditional but you have to make do on the island)

Dough
1 1/4 cups of AP flour
6 tbls hot water
3 tbls cold water (or however much it takes to moisten the dough)

Filling
4 oz ground turkey (you can use pork, chicken, beef, a combination if you like - pork is more traditional)
1 green onion
1/2 inch peeled ginger
2 garlic cloves
salt/pepper
dash of sesame oil
2 tsp cornstarch
1 tsp soy sauce
2 leaves of cabbage (use any vegetable you like, this was the only thing I could find that was green and would go with the filling) - approx. 1/4 - 1/2 cup chopped

Onto the fun part.....

To make the dough, place the flour in a bowl. Make a small well in the center and add the hot water. Mix until small crumbs begin to form and the flour begins to moisten. Add 1 tbl of cold water at a time until all of the dough comes together and it's no longer sticky. I added about 3-4 tbls of water. Oil a bowl lightly and place the dough in the bowl to sit for approx. 30 min. This will let the dough rest before you roll again.

To make the filling, place the ground turkey in a bowl. Add cornstarch, soy sauce, sesame oil, salt and pepper. Mix well. Mince the green onion, garlic and ginger very finely (Use a garlic press for the garlic/ginger if you so desire). Don't worry if there are a few pieces that are slightly larger. Chop the cabbage into small pieces, the smaller the better (think the size of a mini M&M) If you have chinese chives, use it. It lends a distinctive taste to the buns. If you don't like cabbage, use any vegetable you like, bok choy is a great substitute. Add all the veggies into the meat and mix well, incorporating everything.

To form the buns, divide the dough into 10 pieces. Taking each piece, flatten it into a circle about 4 inches in diameter. Place 1 heaping teaspoon of filling into the center and pinch the sides together. If there's excess dough, you can trim it off. I placed it between my hands after forming the bun and rolled it a few times to get it more even before patting it slightly. Continue until you've formed all of the buns.

In a non-stick skillet/pan, heat 2 tsp of oil on medium heat. Place the buns in the pan and fry on both sides until they're nicely golden. Add 1/2 cup of boiling water, place a lid on the pan and cook until the water has evaporated.
For a quick sauce, you can combine some vinegar, garlic chili sauce and sesame oil to taste.